Last Wednesday I began editing my visual poem. As I mentioned before, filming went very smoothly with barely any issues which was a relief considering I’ve had a lot of disruptions in my past projects.
*Screenshots were taken after I had finished editing because I didn’t have time to work on the blog as I was editing, but I’ll explain the process I went through
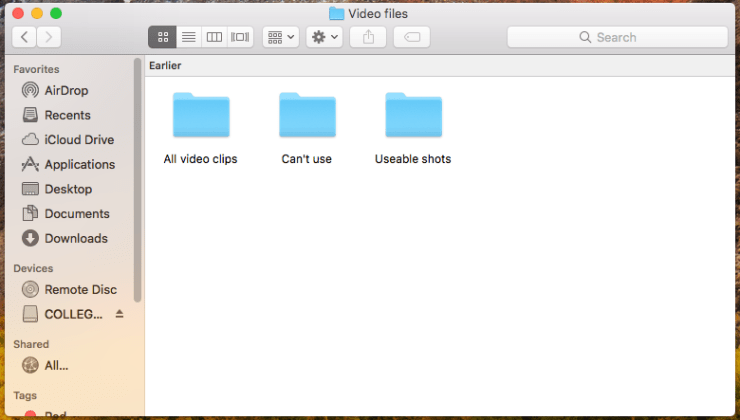
I started off editing my sorting the video files into good and bad folders. The good folder was for all the shots I thought could be usable in the video, and the bad folder was for the latter. I also made a folder for all the video clips I made so that if I accidentally deleted a video file in one folder, I could copy and paste it back in.
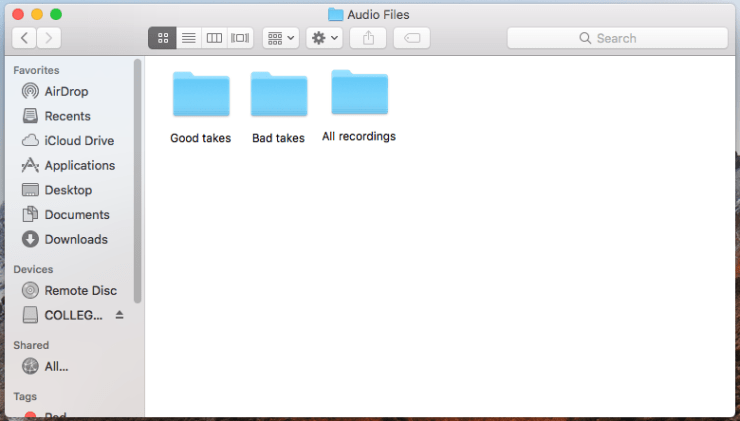
Just as I did with the video files, I separated all of Ioan’s voice recordings into separate files. Again, this was done because it makes it easier for me to find the suitable recordings for the video.
This didn’t take me long to do as I hadn’t really taken a lot of shots to begin with anyway, so sorting them out was easy enough to do. It took more time to separate the audio files because I had to shift through recordings that sounded similar but had to really focus on the audio quality on each clip. It’s important to do this step because when you come to actually edit the video, you can import all the usable recordings from the right folder rather than sifting through countless files on Premier.
The next step was to open up Premier and set up the video settings to prep the editing. I also added the title which was ‘Human Interest‘. Once Premier loaded, I made sure to save straight away so that everything I had set up stayed as it is. I then imported all the video files from the usable shots and dragged them into the editing timeline.

They all came out mixed up which meant that I had to move them around and put them in order. Luckily I was following my shot list and story timeline to help me refresh my memory on the order of the shots. This was somewhat time consuming but I had all day to edit so it wasn’t a concern of mine.
Once I had arranged all the clips together, I un-linked the audio from the video file. I did this because Ioan had recorded a narration for me that plays throughout the video and I wanted it to stand out. I also did this because I didn’t want any unwanted background noise playing as the video progressed. This would have ruined the video which is exactly what I don’t want to do. My plan was to keep Ioan’s narration, add in some sound effects and include an uneasy music track to play through the video.

Next, I dragged each voice recording of Ioan into the mini editing screen available on premier. This feature allows me to cut off any video clip/audio recording at the right point. It gives a more accurate cut than slicing the video on the regular editing timeline. When we recorded the dialogue, I told Ioan to pause after each sentence so that it would make it easier for me to separate the same recording into to parts to fit the video clips I had. This process didn’t take that long to do which was somewhat of a surprise to me.
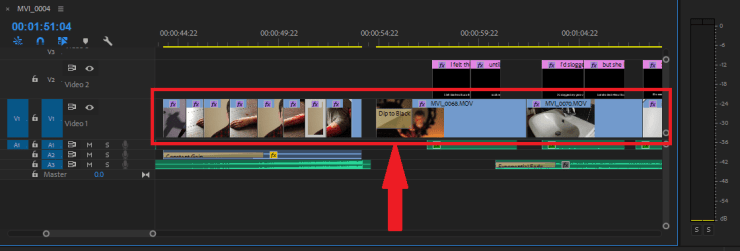
The video clips still hadn’t been cut together, so this was my next step. I put the voice recordings of Ioan in order on the timeline then began cutting the video clips. As I was doing this, I found that one or two clips I had didn’t look good enough to include in the video. Either the framing was too bad or there was some form of continuity. I chose not to use these shots and instead look for another shot I could use. I found it easy to link the voice recordings of Ioan to the video clips, I did have to move some things around to make it work but I managed to do it in no time.
The murder scene was the part of the video that I really wanted to stand out. On the lines ‘She turned away, I stabbed.’ I left a pause in where the murder happens. I didn’t want to show the actual murder happen, but the aftermath. It needed to have some impact. To do this I wanted to have a quick shots of the camera panning up towards Daisy lying on the floor, and Ioan being completely out of breath and covered in blood. My inspiration for this was by watching this video by Tyler the creator.
From 1:43 to 2:24 there’s very quick shots of the artist performing into the camera. Personally the shots are a bit too quick for me to put into my video, but I wanted to jump cut between Ioan and Daisy. I added on a gradual ear ringing sound effect and a dramatic tension building sound effect to emphasise the realisation of what this character had just done. I feel as though it fits very well with the scene, if I had added anymore sound I believe it would have ruined the suspense. Here’s an example of what I’ve done.
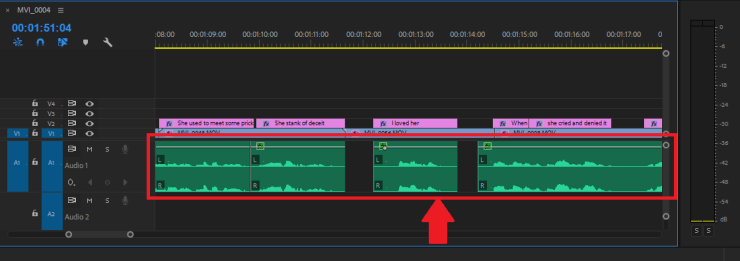
I wanted to make the recording of Ioan sound like he was on the phone, which meant that I had to manipulate the audio. I’ve never done something like this before, so I was experimenting while editing the video. After looking at some YouTube videos, I found this one had the most advice.
I found out that I had to manipulate the maximum frequency of the audio track. Premier has options for this – Highpass and Lowpass. The lowpass sends low frequency signals, and the highpass does the opposite. In order to make the phone sound effect I discovered that the Lowpass frequency had to be higher than the highpass frequency. I’m not sure why but that’s what seemed to work for me. Here’s a screenshot of the manipulated audio.
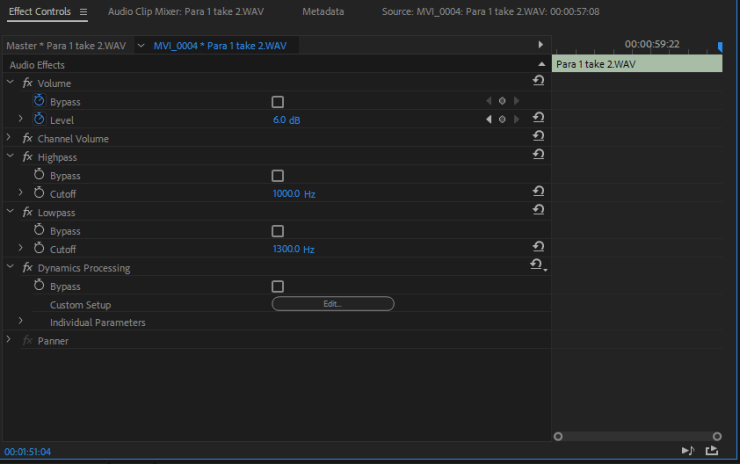
I found that the highpass had to have a cut off of 1000.0 Hz and the Lowpass had to be 1300.0 Hz. This gave the effect of a phone call, but I made sure that it was clear enough to understand. It took me around 2 hours to do this as I did try figuring it out myself to start, but then I had to look it up. This was the most time consuming task out of the whole project.
Once I sorted the video and recordings I made into a timeline, I saved the project and uploaded my first draft to YouTube. I didn’t show this draft to my lecturers because I felt as though it wasn’t enough to show them to get feedback on. I uploaded it on my college YouTube channel because then I could look back on it as I kept adding more stuff onto it to use it as a rough guide of where I would put everything.
On Thursday I started finding music and sound effects to put in my video. My original plan was to make my own music for this video, but I decided not to do this because of the limited time I have left. I found videos on YouTube that had the appropriate sounds for me to use, so I put them into my video. I wanted to keep the sound as minimal as possible because to me, horror is all about suspense.
This video explains my point clearly – barely any sound, no dialogue and an overall uneasy feeling. This is what I wanted to achieve in my video. If I layer audio on top of audio, it would ruin my whole concept of suspense and unease.
The only sounds I’ve used in my video are:
- A police siren
- An ear ringing sound effect
- Added music for suspense
- A dramatic build up sound effect
- Dripping tap
- Dialogue
Little noise or sound in horror builds up the feeling of the ‘fear of the unknown‘. This is why I’m drawn to horror and that’s why I wanted to keep as little sounds in the video as possible. Judith suggested I add more in, but it wouldn’t have the same effect that I intended to do.
A problem I came across in feedback was that the video isn’t as long as the lecturers wanted it to be. The poem is short itself and because of this I didn’t want to overload the video with too many shots. So, to make the video a bit longer I went back and filmed a few more clips that I thought would be good enough for a 30 second or so intro. This way it gives a bit of a background into the situation while also extending the length of the video.
Once I had found suitable clips for an intro, I cut them all together and put them into the sequence just after the titles of the video. I added a faint police siren in the background of the video to make it so that this is after the murder took place. I personally believe it has that effect and gives a but more context to the video.
After watching through my video a few times, as well as showing it to my friends and family, I decided that I was satisfied with what I made and was ready to upload the final video to YouTube. This is what I have edited together.
I’m very pleased with how my video turned out. I personally think it’s the best video I’ve made since I started this course. I wanted to add elements of film noir into my video because studying it was one of my favourite parts of the course.
Whilst I was editing, I felt as though my editing skills had been improved dramatically compared to the video I short last year. I was able to manipulate the audio track to make it sound like a phone conversation, I added shots of the video transitioning from out of focus into focus, I figured out how to balance the colours of the clips to give it a really cold feel, and finally I was able to complete the editing process in just 2 weeks.
Now that I’m happy with this result, I’m going to upload it onto my college YouTube channel and as for feedback from my friends and family. I will take notes of all the feedback which will then help me structure my evaluation on the final video. Once I have written my evaluation, I’ll move onto my reflective journal which will describe the challenges I went through throughout this project.
